


Before starting make sure to read the articles VPN Quickstart and Setup VPN.
How to install ClashX Pro for mac OS.
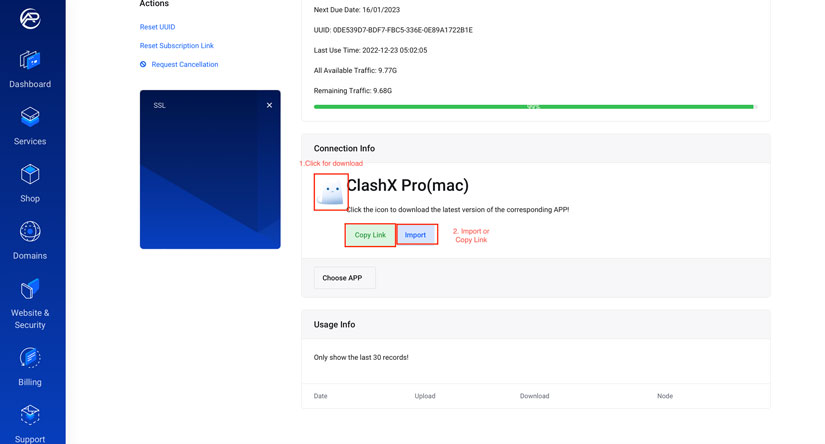
1. From Choose APP button, Select ClashX Pro(mac).

2. install the APP
-
Click the icon to download and install the latest version of ClashX Pro(mac)!
-
By Clicking on the Import button. You can automatically add a subscription link to ClashX Pro or Click on Copy Link Button to add it manually.
3. Import Subscription Link to ClashX Pro
- Type Config Name (Example:ARC)
- Click on OK
- Click on Update
- Close Window

For Manual Copy Link, Open ClashX and follow Menu Config> Remote Config > Manage or ⌘M.
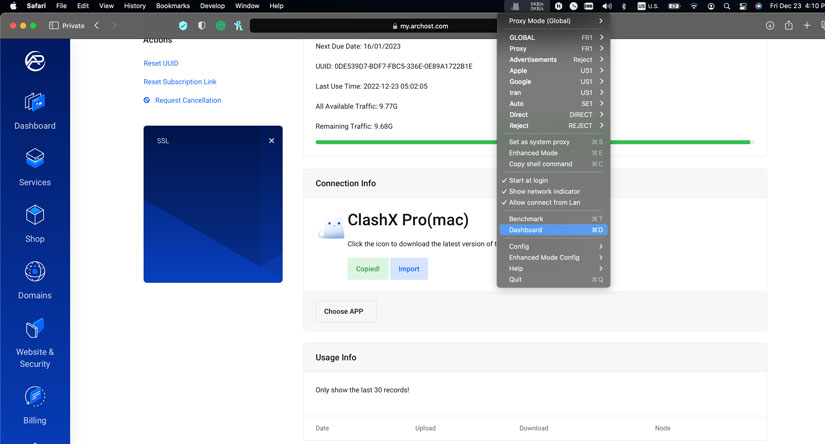
4. From the top menu bar, Click on the ClashX icon and Choose Dashboard or ⌘D.
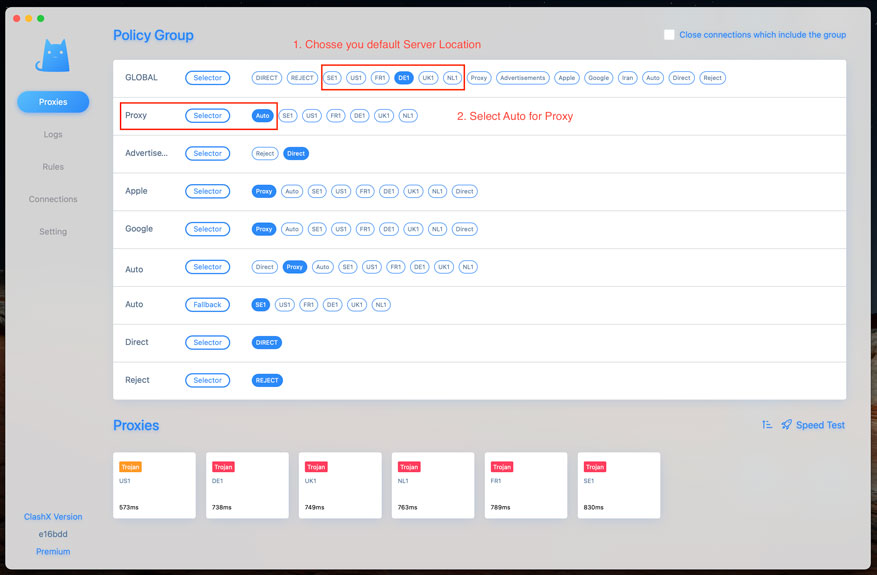
5. In Proxies Policy Group:
- Choose Your Default Server Location(Example: DE1) on Global Tap.
- Select Auto on Proxy Tab
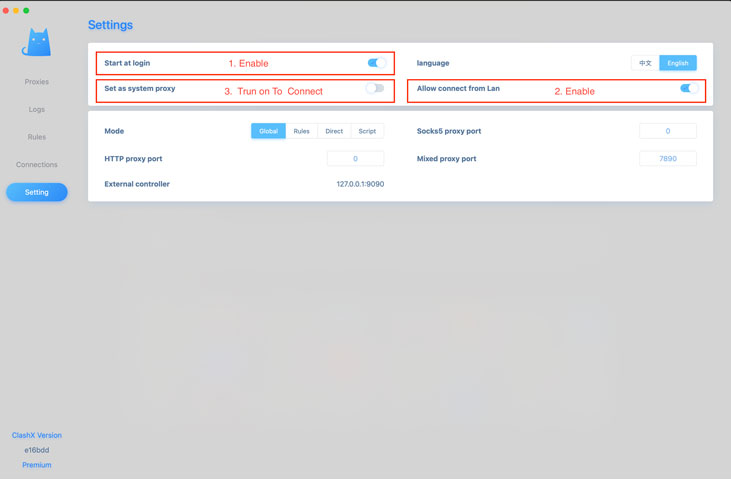
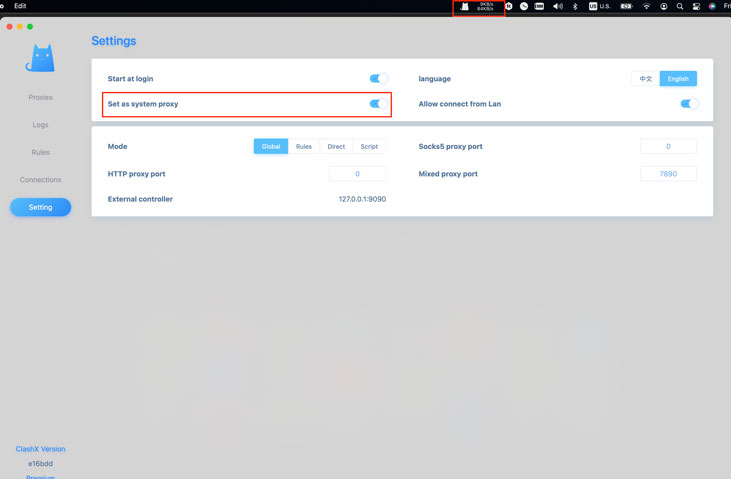
6. From Settings
- Enable Start at login.
- Enable Allow connect from Lan
- To Connect the VPN enable Set as system proxy or ⌘S.
7. Connect VPN
After enabling the Set system proxy, all the traffic pass through ClashX, and on the top menu bar, the ClashX icon will be turned on to the light.
8. Connect to Ultrafast ArcHost VPN servers optimized for streaming, gaming, or torrenting!
